MENU
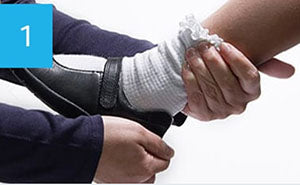
1. Heel Grip – whilst your child is sitting lift one foot up and hold the ankle with one hand and grip the heel of the shoe with your other hand. Pull down gently a few times to check the shoe is gripping the heel well, now repeat on the other foot.

2. Top of the shoe – ask your child to stand up. Use your fingers to feel around the top of the shoe and check there are no gaps particularly between the shoe and the heel.

3. Ankle – feel around the ankle bone to check the shoe does not touch the ankle bone as this could rub. If the shoe has a padded collar (it will feel soft and padded) it is designed to support the ankle and will touch the ankle bone.
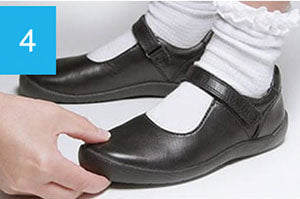
4. Length – feel the toes-end of each shoe for the end of your child’s longest toe. Apply gentle pressure to check that the toe is not pressing the end of the shoe. You should be able to feel the growing room in each shoe with your thumb. Ideal growing room is approximately one and a half centimetres (15mm) at the front of each shoe.

5. Width – feel along each side of the shoe with your hand you shouldn’t feel any pressure or bulging at the sides and the widest part of the foot should be in the widest part of the shoe.
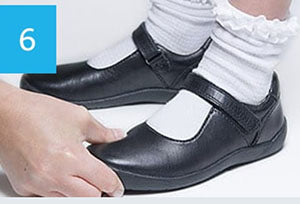
6. Depth – rub your thumb across the top of the shoe, you should feel the leather (or other upper material) move with a shallow ripple effect. If there is no movement at all the shoe is too narrow, if you can push the leather into a ridge the shoe is too wide.
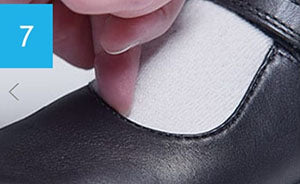
7. Depth – with a low cut shoe (e.g. Mary Jane style) run a finger under the top part. Make sure it is not so tight that the foot bulges out of it and not so loose that there is a big gap underneath.
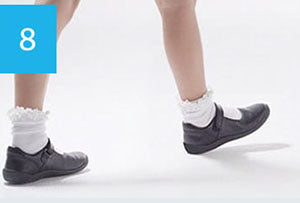
8. Walking – ask your child to walk in the shoes. They should be able to walk easily and naturally. The shoes should not slip off at the heel and there should not be excessive gaping at the sides.


Sleeve High Neck Bodycon Dress
$132.00
Lorem ipsum dolor sit amet, consectetur adipiscing elit. Nam fringilla augue nec est tristique auctor. Donec non est at libero.